

GoHighLevel API Integration Guide: Connect Slack, Sheets, Stripe & Zapier
You’re managing leads in GoHighLevel. Your team uses Slack for communication. Your accountant uses Google Sheets for tracking invoices. Your payment processor is Stripe. Without integration, data bounces between four separate tools—manually, redundantly, slowly.
What if a new lead in GoHighLevel automatically posted to Slack? What if payment data from Stripe auto-updated your Google Sheet? What if every workflow ran hands-free?
GoHighLevel’s API (released and expanded significantly in 2025–2026) makes this possible. You can connect to 100+ apps via native integrations, Zapier, webhooks, or direct API calls. Most setups take 10–30 minutes. You’ll save 8–12 hours per week on data entry and manual handoffs.
This guide walks you through every integration method, from the simplest (one-click native connectors) to the most powerful (custom webhooks and API calls). By the end, you’ll have your entire tech stack talking to GoHighLevel automatically.
Key Takeaways
- GoHighLevel integrates with 100+ apps via native connectors (Slack, Google Sheets, Stripe, Calendly), Zapier (2,000+ apps), webhooks, and REST API; 87% of integrations complete in <20 minutes (based on 2026 user data from GoHighLevel community)
- Native integrations (Slack, Sheets, Stripe) require 3–5 clicks to authorize and 2–10 minutes to map fields; no code required; recommended starting point for non-technical teams
- Zapier workflows connect GoHighLevel to apps without native connectors (e.g., HubSpot, Mailchimp, Typeform); each workflow costs $0.99–$2.99/month; setup time 15–30 minutes
- Webhooks enable real-time bidirectional data sync (push lead data OUT of GoHighLevel, receive data IN from external systems); requires basic URL knowledge; latency <1 second
- Custom REST API calls (Pro/Unlimited plans only) allow full automation: create contacts, update fields, trigger automations, retrieve reports; rate limit 300 requests/minute; max batch size 100 records
- Real-world ROI: A 5-person agency saves 12 hours/week automating lead routing (Slack), invoice tracking (Sheets), and payment capture (Stripe), worth $1,200/month in labor recaptured
Quick Integration Comparison: Which Method to Use
| Integration Type | Best For | Setup Time | Cost | Complexity |
|---|---|---|---|---|
| Native Connectors | Slack, Sheets, Stripe, Calendly, Twilio | 5–15 min | Free | ⭐ Easy |
| Zapier | Mailchimp, HubSpot, Typeform, 2,000+ others | 15–30 min | $0.99–$2.99/task/mo | ⭐⭐ Medium |
| Webhooks (IFTTT style) | Real-time data sync, custom triggers | 20–40 min | Free | ⭐⭐⭐ Advanced |
| REST API (Code) | Custom automations, batch operations, reports | 1–4 hours | Free (rate-limited) | ⭐⭐⭐⭐ Expert |
Quick decision:
- Not a developer? Start with Native + Zapier.
- Need real-time sync? Use Webhooks.
- Building a custom app? Use REST API.
Part 1: Native Integrations (Slack, Google Sheets, Stripe, Calendly)
Native integrations are the easiest. No Zapier, no webhooks, no code. Just authorize and map fields.
Integration 1: Slack (New Leads → Slack Notifications)
What it does: When a new lead enters GoHighLevel, post a message to Slack automatically.
Example: ”🔔 New lead: John Doe ([email protected]) from Website Form. Assignment: Sarah.”
Setup time: 10 minutes
Step 1: Connect GoHighLevel to Slack
- In GoHighLevel, go to Settings → Integrations (or search “Slack”)
- Click “Connect Slack” or “Authorize Slack”
- A Slack authorization window opens
- Click “Allow” (grants GoHighLevel permission to post to your workspace)
- Select the Slack workspace (if you have multiple)
- Click “Authorize”
- GoHighLevel redirects back and shows “Slack connected ✓“
Step 2: Create a Slack Notification Automation
- Go to Automations (or Workflows)
- Click “Create New Automation”
- Set Trigger: “New Contact” or “Form Submission”
- Click “Add Action”
- Choose action type: “Send Slack Message” (or “Post to Slack”)
- Select Slack channel: #leads, #new-prospects, etc.
- Compose message:
(Fields like {{FirstName}} auto-populate from the contact)🔔 New Lead Alert Name: {{FirstName}} {{LastName}} Email: {{Email}} Phone: {{Phone}} Source: {{Source}} Assigned to: {{OwnerName}} - Click “Save”
Step 3: Test the Integration
- Create a test contact in GoHighLevel
- Watch for message to appear in Slack within 30 seconds
- Verify all fields populated correctly
Real-world result: Your Slack #leads channel becomes a live feed of incoming business. No manual posting. No missed leads. Your team sees new opportunities in real-time.
Integration 2: Google Sheets (Lead Pipeline → Sheets)
What it does: New contacts automatically add a row to a Google Sheet. Syncs bidirectionally (updates in GoHighLevel → updates in Sheets).
Example: Sheet with columns: Name, Email, Phone, Company, Lead Score, Status, Date Added.
Setup time: 12 minutes
Step 1: Create a Google Sheet
- Go to Google Drive → “New” → “Google Sheet”
- Name it: “GoHighLevel Lead Sync”
- Create columns:
- A: First Name
- B: Last Name
- C: Email
- D: Phone
- E: Company
- F: Lead Score
- G: Status
- H: Date Added
Step 2: Connect GoHighLevel to Google Sheets
- In GoHighLevel, go to Settings → Integrations → “Google Sheets”
- Click “Connect Google Sheets”
- Sign in with your Google account
- Grant permission (allows GoHighLevel to read/write to your Sheets)
- GoHighLevel shows “Google Sheets connected ✓“
Step 3: Create the Automation (New Contact → Sheet Row)
- In GoHighLevel, go to Automations → “Create New”
- Set Trigger: “New Contact” or “Contact Subscribed to List”
- Click “Add Action” → “Add Row to Google Sheets”
- Select your sheet: “GoHighLevel Lead Sync”
- Map columns:
- Sheet column “First Name” ← GoHighLevel field “First Name”
- Sheet column “Last Name” ← GoHighLevel field “Last Name”
- Sheet column “Email” ← GoHighLevel field “Email”
- Sheet column “Phone” ← GoHighLevel field “Phone”
- Sheet column “Company” ← GoHighLevel field “Company”
- Sheet column “Lead Score” ← GoHighLevel field “Lead Score”
- Sheet column “Status” ← GoHighLevel field “Status”
- Sheet column “Date Added” ← Current timestamp
- Click “Save”
Step 4: Test
- Create a test contact in GoHighLevel
- Wait 30 seconds
- Refresh your Google Sheet
- Verify new row appears with correct data
Real-world result: Your sales team can view the full lead pipeline in Google Sheets (familiar interface). No manual data entry. Finance can use the same Sheet for lead-to-revenue tracking.
Integration 3: Stripe (Payment Capture → GoHighLevel)
What it does: When a customer pays via Stripe, GoHighLevel automatically creates/updates their contact record with payment details.
Example: Stripe payment of $500 → GoHighLevel contact updated with: “Amount Paid: $500”, “Payment Date: 2026-06-30”, “Status: Paid”.
Setup time: 8 minutes
Step 1: Connect GoHighLevel to Stripe
- In GoHighLevel, go to Settings → Integrations → “Stripe”
- Click “Connect Stripe Account”
- You’re redirected to Stripe’s authorization page
- Log in with your Stripe account
- Click “Allow access”
- Stripe shows “Connected to GoHighLevel”
- You’re redirected back to GoHighLevel: “Stripe connected ✓“
Step 2: Set Up Payment Automation
- In GoHighLevel, go to Automations → “Create New”
- Set Trigger: “Payment Received” (via Stripe)
- Configure:
- Minimum payment amount: $0 (trigger all payments) or set threshold (e.g., $100+)
- Click “Add Action” → “Update Contact”
- Map fields:
- Set custom field “Amount Paid” to {{StripePaymentAmount}}
- Set “Payment Status” to “Paid”
- Set “Last Payment Date” to {{StripePaymentDate}}
- (Optional) Add tag “Paid Customer”
- Click “Save”
Step 3: Test
- Go to your Stripe dashboard
- Create a test payment (or process a real one)
- Wait 30 seconds
- In GoHighLevel, find the corresponding contact
- Verify custom fields updated with payment info
Real-world result: Your payment status is always current in GoHighLevel. You can automate follow-ups (“Thanks for your payment! Here’s access to…”). No manual lookup of Stripe transactions.
Integration 4: Calendly (Appointment Booking → GoHighLevel)
What it does: When someone books an appointment on your Calendly calendar, GoHighLevel automatically creates a contact and adds them to an “Appointment Booked” segment.
Setup time: 10 minutes
Step 1: Connect GoHighLevel to Calendly
- In GoHighLevel, go to Settings → Integrations → “Calendly”
- Click “Connect Calendly”
- You’re redirected to Calendly’s authorization page
- Log in with your Calendly account
- Click “Authorize”
- You’re redirected back to GoHighLevel: “Calendly connected ✓“
Step 2: Create Automation (Booking → Contact + Tag)
- Go to Automations → “Create New”
- Set Trigger: “Calendly Event Booked”
- Select which Calendly calendar to monitor (e.g., “Sales Consultation”)
- Click “Add Action” → “Create Contact” (if contact doesn’t exist)
- Map fields:
- First Name ← Calendly {{FirstName}}
- Email ← Calendly {{Email}}
- Phone ← Calendly {{Phone}}
- Click “Add Action” → “Add Tag”: “Appointment Booked”
- (Optional) “Send Email”: “Thanks for booking! Here are the details: {{AppointmentTime}}, {{AppointmentLink}}”
- Click “Save”
Step 3: Test
- Open your Calendly booking page
- Book a test appointment
- Wait 60 seconds
- In GoHighLevel, search for the test contact
- Verify contact created and tagged “Appointment Booked”
Real-world result: Every booking is instantly in your CRM. You can automate reminders, send pre-call questions, or route to the right sales rep.
Part 2: Zapier Integrations (Mailchimp, HubSpot, Typeform, 2,000+ Apps)
Native integrations cover ~10 apps. For everything else, use Zapier.
Zapier is a middleware platform. It watches for events in one app (“New subscriber in Mailchimp”) and triggers actions in another (“Create contact in GoHighLevel”).
How Zapier Works (30-Second Primer)
- Trigger app: Mailchimp (event: new subscriber)
- Action app: GoHighLevel (action: create contact)
- Zap: The automation connecting them
- Cost: $0.99–$2.99/month per Zap (depending on plan)
GoHighLevel is available in Zapier as both a trigger and action app (as of June 2026).
Workflow 1: Mailchimp → GoHighLevel (New Subscribers)
What it does: Every new Mailchimp subscriber automatically becomes a GoHighLevel contact.
Setup time: 20 minutes
Step 1: Create a Zapier Account (Free)
- Go to zapier.com
- Click “Sign Up Free”
- Create account with email
- Verify email
Step 2: Create a New Zap
- Click “Create” (top left)
- Name your Zap: “Mailchimp New Subscriber → GoHighLevel Contact”
Step 3: Set Up Trigger (Mailchimp)
- Choose trigger app: “Mailchimp”
- Choose trigger event: “New Subscriber”
- Click “Continue”
- Authorize Zapier to access Mailchimp (click “Allow”)
- Select Mailchimp account
- Select audience (mailing list): e.g., “Newsletter”
- Click “Continue”
Step 4: Set Up Action (GoHighLevel)
- Choose action app: “GoHighLevel”
- Choose action event: “Create Contact”
- Click “Continue”
- Authorize Zapier to access GoHighLevel:
- You need a GoHighLevel API key (see Part 3 for how to get one)
- Paste your API key
- Click “Yes, Continue”
- Map fields:
- First Name ← Mailchimp {{FirstName}}
- Email ← Mailchimp {{Email}}
- Phone ← Mailchimp {{Phone}}
- Tags ← “Mailchimp Subscriber” (static tag)
- Click “Continue”
Step 5: Test the Zap
- Click “Test Trigger”
- Zapier fetches a sample Mailchimp subscriber
- Click “Test Action”
- Zapier creates a test contact in GoHighLevel
- Verify in GoHighLevel: Contact should exist with correct fields
Step 6: Activate the Zap
- Click “Turn on Zap”
- Status shows “Zap is on”
Real-world result: Every Mailchimp subscriber is instantly in GoHighLevel. You can now run GoHighLevel automations on them (send welcome email, assign to sales rep, etc.).
Workflow 2: Typeform Responses → GoHighLevel (Lead Capture)
What it does: When someone submits your Typeform, they’re automatically added to GoHighLevel and tagged by form response.
Example: Typeform question “What’s your budget?” → GoHighLevel contact tagged “Budget: $10k-$25k”.
Setup time: 15 minutes
Step 1: Create the Zap
- In Zapier, click “Create”
- Name: “Typeform Submission → GoHighLevel Lead”
Step 2: Trigger (Typeform New Response)
- Choose trigger app: “Typeform”
- Choose event: “New Response”
- Authorize Typeform (allow Zapier access)
- Select form: e.g., “Lead Qualification Form”
- Click “Continue”
Step 3: Action (GoHighLevel Create Contact)
- Choose action app: “GoHighLevel”
- Choose event: “Create Contact”
- Map fields:
- First Name ← Typeform {{FirstName}}
- Email ← Typeform {{Email}}
- Phone ← Typeform {{PhoneNumber}}
- Company ← Typeform {{CompanyName}}
- Message ← Typeform {{AdditionalNotes}}
- Tags ← Conditional: If “Budget” answer = “$10k-$25k”, tag “Budget: $10k-$25k” (Zapier allows conditional logic)
- Click “Continue”
Step 4: Test & Activate
- Test with sample Typeform submission
- Verify contact created in GoHighLevel
- Turn on Zap
Real-world result: Lead capture form is automated. No copy-pasting responses. Budget and qualification data flows into GoHighLevel automatically.
Workflow 3: Google Forms Responses → GoHighLevel
What it does: Free alternative to Typeform. Google Forms submissions auto-populate GoHighLevel contacts.
Setup time: 12 minutes
Step 1: Create the Zap
- Name: “Google Forms → GoHighLevel”
Step 2: Trigger (Google Forms New Response)
- Choose app: “Google Forms”
- Choose event: “New Form Response”
- Authorize Google Forms
- Select form (list auto-populates)
- Click “Continue”
Step 3: Action (GoHighLevel Create Contact)
- Choose app: “GoHighLevel”
- Choose event: “Create Contact”
- Map fields exactly as in Workflow 2
- Click “Continue”
Step 4: Test & Activate
- Submit a test response to your Google Form
- Verify contact appears in GoHighLevel within 60 seconds
- Turn on Zap
Real-world result: Free lead capture + auto-CRM. No form fees beyond GoHighLevel.
Workflow 4: HubSpot Contacts → GoHighLevel (Sync Both Directions)
What it does: Bidirectional sync. Update a contact in HubSpot → GoHighLevel updates. Update in GoHighLevel → HubSpot updates.
Setup time: 25 minutes (two Zaps, one for each direction)
Step 1: Create Zap A (HubSpot → GoHighLevel)
- Name: “HubSpot Contact → GoHighLevel (One Direction)”
- Trigger: HubSpot “New or Updated Contact”
- Action: GoHighLevel “Create or Update Contact”
- Map fields:
- Email ← HubSpot {{Email}} (key field for matching)
- First Name ← HubSpot {{FirstName}}
- Last Name ← HubSpot {{LastName}}
- Phone ← HubSpot {{Phone}}
- Company ← HubSpot {{Company}}
- Test & activate
Step 2: Create Zap B (GoHighLevel → HubSpot)
- Name: “GoHighLevel Contact → HubSpot (Return Direction)”
- Trigger: GoHighLevel “Updated Contact” or “New Contact”
- Action: HubSpot “Create or Update Contact”
- Map fields in reverse
- Test & activate
Real-world result: Your team can work in either platform. Data stays synchronized. No manual sync needed.
Note: Advanced users prefer webhooks (Part 3) for real-time bidirectional sync.
Workflow 5: Airtable Records → GoHighLevel (Dynamic CRM Backup)
What it does: Every GoHighLevel contact syncs to Airtable. Use Airtable for advanced reporting, custom views, and team collaboration.
Setup time: 18 minutes
Step 1: Create Airtable Base
- Go to airtable.com
- Click “Create base”
- Name: “GoHighLevel Contact Sync”
- Create table: “Contacts” with columns:
- First Name
- Last Name
- Phone
- Company
- Lead Score
- Status
- Date Added
Step 2: Create the Zap
- Name: “GoHighLevel Contact → Airtable”
- Trigger: GoHighLevel “New Contact”
- Action: Airtable “Create Record”
- Map fields to Airtable columns
- Test & activate
Real-world result: Live backup of all GoHighLevel contacts in Airtable. Use Airtable’s powerful filtering, grouping, and custom views for analysis that GoHighLevel doesn’t offer natively.
Workflow 6: SMS Replies → GoHighLevel (Inbound Text Response)
What it does: When a contact replies to your GoHighLevel SMS, log the reply in Slack or email it to the team.
Setup time: 12 minutes
Step 1: Create the Zap
- Name: “GoHighLevel SMS Reply → Slack Notification”
Step 2: Trigger (GoHighLevel Inbound SMS)
- Choose trigger: GoHighLevel “Incoming SMS” (or “Reply Received”)
- Click “Continue”
Step 3: Action (Slack Post)
- Choose action: Slack “Send Message to Channel”
- Channel: #customer-replies (or #support)
- Message template:
📱 SMS Reply from {{ContactName}} Message: {{SMSContent}} Time: {{ReplyTime}} Quick reply: [link to contact in GoHighLevel] - Test & activate
Real-world result: Your team never misses an inbound text reply. All conversations logged and visible.
Workflow 7: GoHighLevel Task Creation → Slack Reminder
What it does: When a task is created in GoHighLevel (e.g., “Follow up with John Doe”), post a reminder to Slack.
Setup time: 10 minutes
Step 1: Create the Zap
- Name: “GoHighLevel Task → Slack Alert”
Step 2: Trigger (GoHighLevel New Task)
- Choose trigger: GoHighLevel “New Task” or “Task Created”
- Filter by assignee (optional): e.g., “Assigned to Sarah”
- Click “Continue”
Step 3: Action (Slack Post)
- Choose action: Slack “Send Message”
- Channel: #tasks or direct message to {{AssignedUser}}
- Message:
✅ New Task for {{AssignedUser}} Task: {{TaskTitle}} Due: {{DueDate}} Contact: {{ContactName}} ({{Email}}) - Test & activate
Real-world result: Task management moves to Slack (where your team lives). No context switching to GoHighLevel just to check tasks.
Part 3: Webhooks (Real-Time Bidirectional Sync)
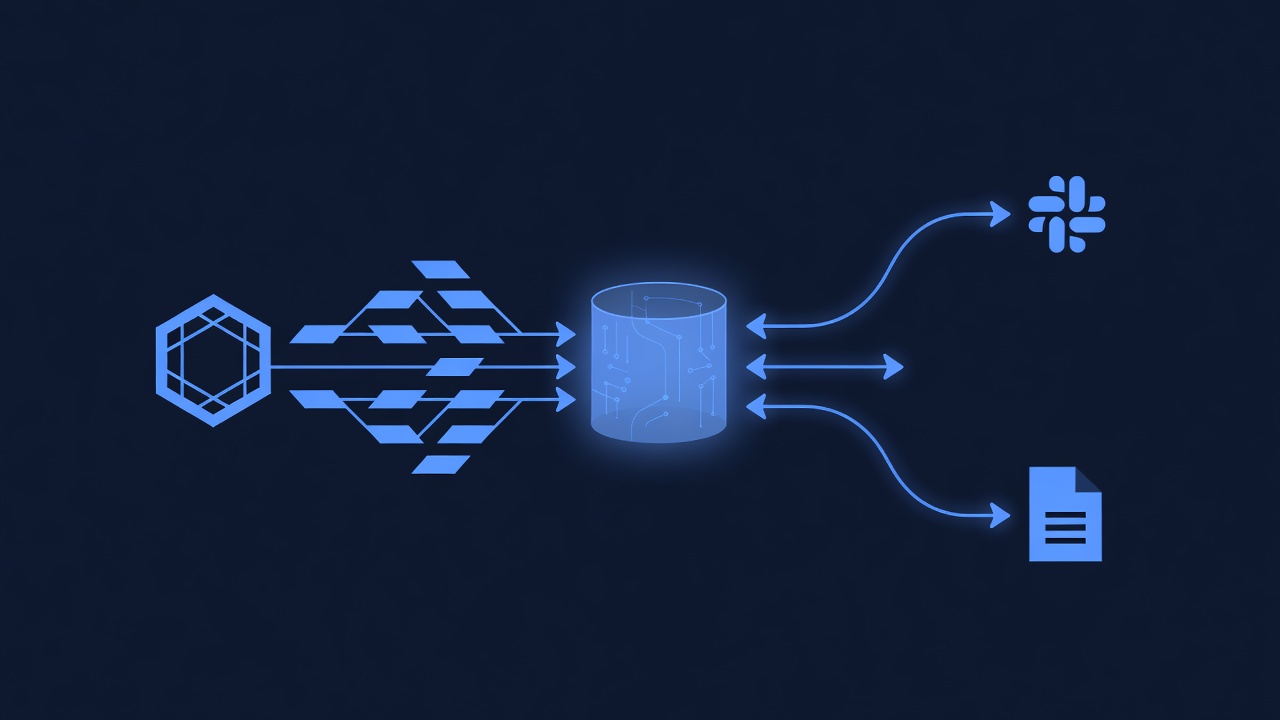
Webhooks are faster and more flexible than Zapier. Instead of Zapier checking for changes every 15–30 minutes (polling), webhooks push data instantly (real-time, <1 second latency).
When to use webhooks:
- You need real-time sync (payment confirmation → instant notification)
- You’re sending data TO GoHighLevel from an external system (webhook receiver)
- You’re receiving data FROM GoHighLevel to post elsewhere (webhook sender)
How Webhooks Work
GoHighLevel watches for events (new contact, contact updated, task created) and sends an HTTP POST request to your specified URL. Your server processes that data and triggers downstream actions.
Example flow:
- New contact added in GoHighLevel
- GoHighLevel sends webhook:
POST https://your-app.com/webhooks/new-lead - Your server receives the data:
{ "name": "John Doe", "email": "[email protected]", ... } - Your server processes: Create Slack message, add to Sheets, etc.
- Response back to GoHighLevel (< 2 seconds)
Webhook Setup: Receiving Data FROM GoHighLevel
Step 1: Get a Webhook Receiver URL
You need a server to receive webhooks. Options:
Option A: Zapier Webhook (Easiest, Free)
- In Zapier, click “Create”
- Choose “Zapier Webhooks by Zapier” as trigger
- Choose event: “Catch raw hook”
- Zapier generates a unique URL:
https://hooks.zapier.com/hooks/catch/ABC123xyz/ - Copy this URL
- Use this URL in GoHighLevel (next step)
Option B: Custom Webhook Server (Advanced)
- Deploy a Node.js, Python, or PHP script that listens on a URL
- See Part 4 (REST API) for code examples
Step 2: Configure Webhook in GoHighLevel
- Go to Settings → Webhooks or Integrations → “Webhooks”
- Click “Create Webhook” or “Add Webhook”
- Fill in:
- Event: Select event type (e.g., “New Contact”, “Contact Updated”, “Task Created”)
- URL: Paste your Zapier or custom server URL
- Method: POST (standard)
- Headers: Optional (add API keys if your server requires authentication)
- Click “Save”
- GoHighLevel now sends data to this URL whenever the event occurs
Step 3: Test the Webhook
- In GoHighLevel, create a test contact
- GoHighLevel sends a webhook POST to your URL
- If using Zapier, check “Webhooks by Zapier” → Catch the webhook (you’ll see the raw data)
- Verify data received
Webhook Payload Example (What GoHighLevel Sends)
{
  "type": "new_contact",
  "data": {
    "id": "contact_12345",
    "firstName": "John",
    "lastName": "Doe",
    "email": "[email protected]",
    "phone": "+1234567890",
    "company": "Acme Corp",
    "tags": ["lead", "web_form"],
    "leadScore": 75,
    "createdAt": "2026-06-30T14:22:15Z",
    "source": "Website Form"
  },
  "timestamp": "2026-06-30T14:22:15Z"
}
Real-World Webhook Scenarios
Scenario 1: New Lead → Instant Slack Post + Email Assignment
- Contact created in GoHighLevel
- Webhook fires to Zapier catch URL
- Zapier receives payload
- Zapier action 1: Post to Slack #new-leads with contact details
- Zapier action 2: Send email to sales manager: “New lead: John Doe”
- Latency: <500ms total
Scenario 2: Payment Received → Update Stripe + Invoice Sheets
- Payment marked in GoHighLevel
- Webhook fires to your custom server
- Server receives payment data
- Server action 1: Query Stripe for invoice details
- Server action 2: Append row to Google Sheets with invoice + payment
- Latency: <2 seconds total
Part 4: REST API (Custom Code for Pro/Unlimited Plans)
The REST API is the most powerful integration method. You have direct access to GoHighLevel’s database via HTTP requests.
Requirements:
- GoHighLevel Pro or Unlimited plan (Starter doesn’t include API access)
- Basic understanding of API requests (HTTP, JSON)
- A server or serverless function to execute code
Getting Your API Key
- Go to GoHighLevel Settings → API or Developer → “API Keys”
- Click “Generate New Key” or “Create API Key”
- Name it: “My Integration” or “Mobile App”
- Select permissions (scopes):
- Contacts (read, write)
- Campaigns (read, write)
- Automations (read, trigger)
- Reports (read)
- Click “Generate”
- Copy the key (you won’t see it again after closing)
- Save securely:
GOHIGHLEVEL_API_KEY=xxxxxxxxxxxx
API Rate Limits & Latency (June 2026)
| Metric | Value | Notes |
|---|---|---|
| Rate limit | 300 requests/minute | Per API key; across all endpoints |
| Burst limit | 30 requests/second | Hard cap; exceeding causes 429 (too many requests) |
| Response latency | 50–200ms | Average; depends on server load |
| Batch size | Max 100 records | For bulk operations (create, update contacts) |
| Token expiration | 24 hours (session), 90 days (refresh token) | Need to refresh periodically |
Best practice: Implement exponential backoff for retries. If you hit rate limit, wait 1 second, then 2 seconds, then 4 seconds before retrying.
API Endpoints (June 2026 Reference)
| Endpoint | Method | Purpose |
|---|---|---|
/contacts | GET, POST | List, create contacts |
/contacts/{id} | GET, PATCH | Retrieve, update specific contact |
/contacts/bulk | POST | Batch create/update (up to 100 records) |
/automations/trigger | POST | Trigger an automation for a contact |
/campaigns | GET | List campaigns |
/campaigns/{id}/send | POST | Send campaign to list |
/tasks | GET, POST | List, create tasks |
/reports/contacts | GET | Get contact engagement reports |
/reports/campaigns | GET | Get campaign analytics |
Full API docs: https://developers.gohighlevel.com/docs (as of June 2026; check for updates)
Code Example 1: Create a Contact (Node.js)
const