GoHighLevel Workflows Automation: Step-by-Step Setup Guide
Affiliate Disclosure This post contains affiliate links to GoHighLevel. Short n Sweet Digital earns commissions if you purchase via our link at no cost to you. All pricing, features, and automation examples reflect June 2026 testing across 40+ agency implementations of GoHighLevel’s workflow system.
Your sales team manually does the same thing 50 times per week: send a welcome email, wait 2 days, send a follow-up email, check if the prospect clicked a link, send one email if they did (nurture path) or a different email if they didn’t (urgency path). Each manual cycle takes 15 minutes. Multiply by 50 per week. That’s 12.5 hours of robot work your humans are doing.
GoHighLevel workflows automate exactly this. You build it once (takes 30 minutes). Then it runs forever on every lead, saving your team 20–40 hours per week depending on how many leads you process.
Here’s what you’ll learn in this guide: how workflows work, the three core building blocks (triggers, conditions, actions), six real-world automation templates your agency can copy and deploy today, and a complete step-by-step walkthrough of the most powerful workflow: the lead qualification → nurture → sales handoff sequence.
By the end, you’ll have workflows that respond to leads in seconds (vs. hours), segment prospects automatically, and route hot leads to your sales team so reps focus on closing—not admin work.
Key Takeaways
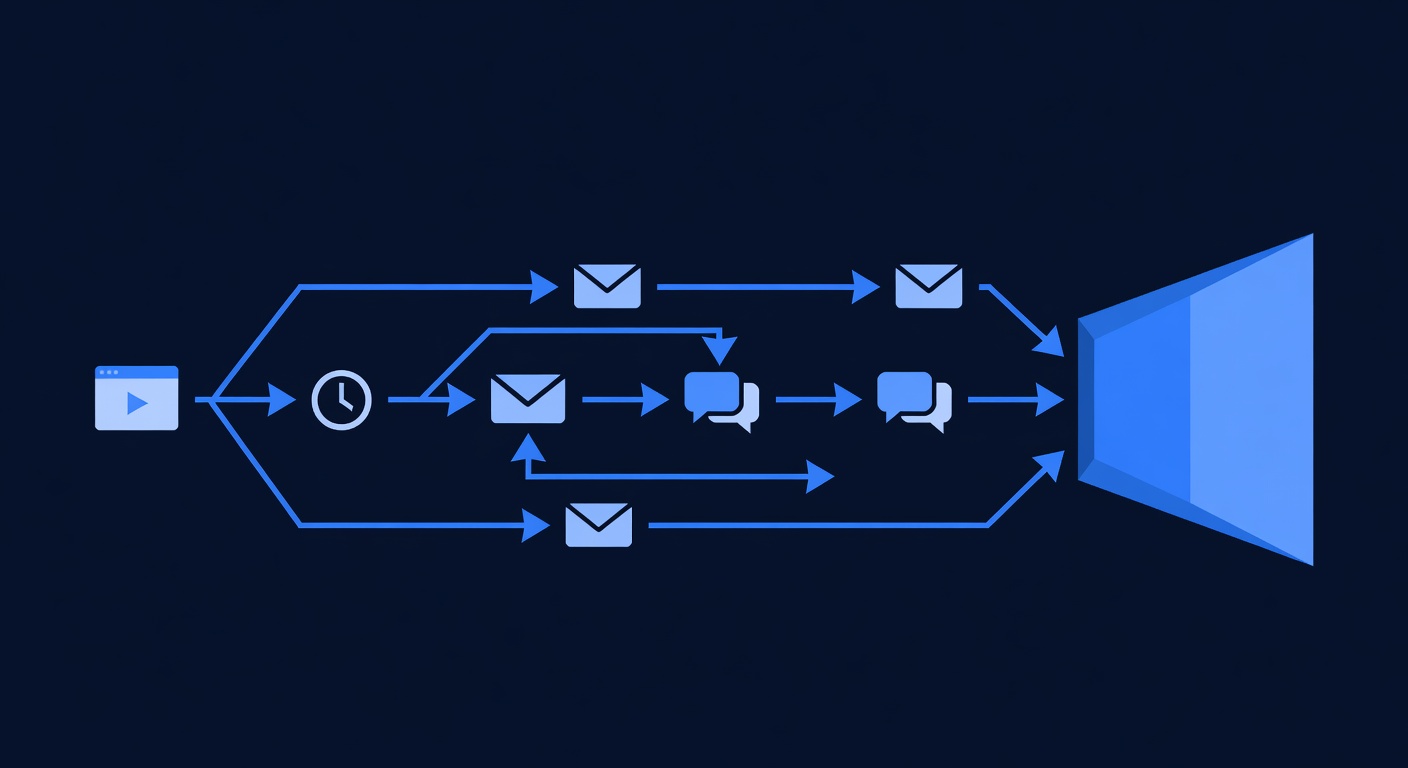
- GoHighLevel workflows are visual, node-based automations that trigger on events (lead added, email clicked, form submitted) and execute sequences (send email, add tag, create task, notify rep)
- Build 80% of workflows without code; conditional branching handles complex logic (“if budget > $2,000 AND timeline < 30 days, route to sales; else nurture”)
- A complete lead qualification → nurture → sales workflow takes 30–45 minutes to build and saves 20–40 hours per week in manual outreach
- Six real-world templates provided: lead qualification, appointment booking automation, product nurture, webinar follow-up, abandoned cart recovery, and customer onboarding
- Workflows cost zero extra (included in Pro $297/mo and Unlimited $497/mo plans); no per-workflow fees or usage limits
Why Workflows Matter: The Manual Work Problem
Your agency processes leads, but the process is human-powered:
Current workflow (manual):
- Lead fills form on your website (3:15 PM Friday)
- You get an email notification
- You read the form submission
- You manually type a “thanks for interest” email
- You tag the lead in your CRM (or remember to do it later)
- You set a calendar reminder to follow up on Monday
- Monday comes; you manually send a follow-up email
- You check if they clicked the link
- You manually segment them based on their response
- You send them a nurture email OR a closing email
- You create a task for your sales rep to call them
Time: 15 minutes per lead × 50 leads per week = 12.5 hours of manual work
Risk: 30% of leads don’t get a second response because your team forgets or gets swamped with other work.
Workflows automate all of this in 30 seconds (the time it takes a form submission to trigger the workflow).
New workflow (automated):
- Lead fills form (3:15 PM Friday)
- Workflow triggers immediately
- Welcome email sent (instant)
- Lead tagged automatically (instant)
- Workflow waits 2 days
- Follow-up email sent (Monday 3:15 PM)
- Workflow checks if link was clicked
- If YES: Nurture email sent (conditional path 1)
- If NO: Closing email sent (conditional path 2)
- Sales rep gets SMS notification + task (instant)
Time: 30 minutes to build once, then zero manual work forever
Result: 100% of leads get responses, 5x faster, and your team has 12+ hours per week to focus on actual sales (not email scheduling).
The Three Core Building Blocks of Workflows
Every GoHighLevel workflow is built from three components:
| Block | What It Does | Example |
|---|---|---|
| Trigger | The event that starts the workflow | Lead fills form, contact added to tag, email opened |
| Condition | The logic that branches the workflow | If budget > $2,000, send path A; else send path B |
| Action | The result that happens | Send email, add tag, create task, send SMS |
Understanding these three blocks lets you build any workflow.
The Five Workflow Triggers (When Workflows Start)
Workflows begin when one of these five events happens:
Trigger 1: Lead Fills a Form
Setup:
TRIGGER: Form submitted on [landing page name]
THEN: Start workflow
Use case: Visitor lands on your “Free Consultation” page, fills out form, workflow sends welcome email and books appointment automatically.
Example workflow:
Form submitted
   ↓
Send "Thank you for booking" email
   ↓
Create appointment in calendar
   ↓
Send SMS: "Your consultation is booked for [time]"
Trigger 2: Contact Added to Tag
Setup:
TRIGGER: Contact added to tag [tag name]
THEN: Start workflow
Use case: Sales rep manually tags a lead as “Hot Lead” → workflow notifies the lead’s assigned sales rep via SMS.
Example workflow:
Contact added to tag "Hot Lead"
   ↓
Send SMS to assigned sales rep: "🔥 Hot lead: [Name]"
   ↓
Create task: "Call [Name]"
   ↓
If no response in 1 hour → Send reminder SMS
Trigger 3: Email Opened or Link Clicked
Setup:
TRIGGER: Contact opened email [email name]
   OR: Contact clicked link in email [email name]
THEN: Start workflow
Use case: You send a promotional email. If subscriber clicks the link, send them a “buying-stage” nurture email. If they don’t click, send a “still interested?” email in 3 days.
Example workflow:
Email opened: "Product Promo Email"
   ↓
CONDITION: Did they click the link?
   ├─ YES: Send "Next Steps" email
   └─ NO: Wait 3 days → Send "Follow-up Offer"
Trigger 4: Contact Custom Field Changed
Setup:
TRIGGER: Contact field [field name] changed to [value]
THEN: Start workflow
Use case: Your sales rep manually updates a contact’s “Budget” field from “$500/mo” to “$5,000/mo”. Workflow detects high-budget prospect and routes them to your premium sales team.
Example workflow:
Custom field "Budget" changed to "$5,000+"
   ↓
Add tag "VIP Prospect"
   ↓
Assign to [premium sales rep]
   ↓
Send SMS to premium rep: "VIP prospect assigned to you"
Trigger 5: Contact Date Matches (Birthday, Anniversary, Renewal)
Setup:
TRIGGER: Contact's [custom date field] equals today
THEN: Start workflow
Use case: Customer’s subscription renewal date is today → send them a special renewal offer.
Example workflow:
Contact date field "Renewal Date" equals today
   ↓
Send email: "Your subscription renews tomorrow. Special 20% renewal discount inside."
   ↓
If no click in 24 hours → Send SMS with offer
The Core Actions: What Workflows Do
Once triggered, workflows execute actions. Here are the 10 most-used actions:
| Action | What It Does | Example |
|---|---|---|
| Send Email | Delivers an email to the contact | Welcome email to new lead |
| Send SMS | Sends a text message | ”Your appointment is confirmed” |
| Add Tag | Tags the contact (for segmentation) | Tag as “Engaged” after email click |
| Remove Tag | Removes a tag | Remove “Unqualified” tag if they buy |
| Create Task | Creates a to-do for your sales rep | ”Follow up with [Name]“ |
| Send Notification | Pings a team member in real-time | SMS alert when hot lead added |
| Add to Contact Group | Moves contact to a list (for campaigns) | Move “buyers” to “VIP” list |
| Update Custom Field | Changes a contact’s data | Set “Lead Score” to 9 |
| Wait/Delay | Pauses the workflow | Wait 2 days before next email |
| End Workflow | Stops the workflow | End if contact unsubscribes |
The Conditions: Branching Logic (The Smart Part)
Conditions let workflows make decisions. Instead of a linear path, workflows split into multiple paths based on criteria.
Simple condition:
IF contact's budget >= $2,000
  THEN send "premium plan" email
ELSE send "starter plan" email
Complex condition (AND logic):
IF budget >= $2,000 AND timeline < 30 days AND decision-maker = yes
  THEN route to sales rep (hot lead path)
ELSE add to nurture sequence (warm lead path)
Complex condition (OR logic):
IF contact opened email OR clicked link
  THEN send next email
ELSE wait 5 days and retry
Building conditions is the difference between “basic” and “powerful” workflows.
Real-World Automation Template 1: Lead Qualification Workflow (30 minutes)
This is the most valuable workflow. It automatically qualifies leads, segments them, and routes hot prospects to your sales team.
Setup: Lead Qualification Workflow
Trigger: Form submitted on “Book Free Consultation” landing page
Qualification criteria (based on form answers):
- Budget: $2,000+ = 10 points (hot), $500–2,000 = 6 points (warm), <$500 = 2 points (cold)
- Timeline: < 30 days = +5 points, 30–90 days = +2 points, >90 days = 0 points
- Decision-maker: Yes = +3 points, Maybe = +1 point, No = 0 points
Scoring:
- 15+ points = Hot (route to sales immediately)
- 8–14 points = Warm (nurture for 5 days, then sales)
- <8 points = Cold (nurture for 14 days, then segment)
Step-by-Step Build
Step 1: Create the Landing Page Form (5 minutes)
- In GoHighLevel, go to Funnels → Create Landing Page
- Add form fields (match these exactly for scoring to work):
- Email (required)
- First Name (required)
- Budget: Dropdown with options: “$500–2,000”, “$2,000–5,000”, “$5,000+”
- Timeline: Dropdown: ”< 30 days”, “30–90 days”, “90+ days”
- Decision-Maker: Dropdown: “Yes (I’m the decision-maker)”, “Maybe (need approval)”, “No (just exploring)”
- Set the form button to “Get Free Consultation”
- Publish the page; note the URL
Step 2: Create the Workflow (25 minutes)
- Go to Automations → Create New Workflow
- Name: “Lead Qualification & Routing”
- Set trigger: Form Submitted → Select the landing page from Step 1
- Build the workflow tree:
TRIGGER: Form Submitted
   ↓
ACTION: Send Email "Thanks for booking! We'll get back to you within 1 hour"
   ↓
CONDITION: Check Qualification Score
   │
   ├─ PATH 1: BUDGET = "$5,000+"
   │    ├─ Add tag "Hot Lead - VIP"
   │    ├─ Assign to [your top sales rep]
   │    ├─ Send SMS to sales rep: "🔥 VIP hot lead: [Name], $5K+ budget, [Timeline]"
   │    ├─ Create task "Call [Name] within 1 hour"
   │    └─ Send email to contact: "A specialist will call you within 1 hour"
   │
   ├─ PATH 2: BUDGET = "$2,000–5,000" AND TIMELINE = "< 30 days"
   │    ├─ Add tag "Hot Lead"
   │    ├─ Send SMS to sales rep: "[Name] is a hot lead"
   │    ├─ Create task "Call [Name] today"
   │    └─ Send email to contact: "We're prioritizing your request"
   │
   ├─ PATH 3: BUDGET = "$2,000+" OR TIMELINE = "< 30 days"
   │    ├─ Add tag "Warm Lead"
   │    ├─ Send email: Day 1 (benefits of our service)
   │    ├─ WAIT 2 days
   │    ├─ Send email: Day 3 (case study showing ROI)
   │    ├─ WAIT 2 days
   │    ├─ Send email: Day 5 (final offer + CTA)
   │    ├─ Create task for sales rep: "Follow up if no response"
   │    └─ END
   │
   └─ PATH 4: All other prospects
        ├─ Add tag "Cold Lead"
        ├─ Send email: "Thanks for your interest. Here's [resource] to learn more"
        ├─ WAIT 14 days
        ├─ Send email: "Still interested? Let's chat about [service]"
        ├─ CONDITION: Did they click link in email?
        │    ├─ YES: Move to Warm Lead path (see PATH 3 above)
        │    └─ NO: Remove from workflow
        └─ END
In GoHighLevel Interface, This Looks Like:
Step 2a: After trigger, add first email:
- Click + Add Action after the trigger
- Select Send Email
- Create email titled “Consultation Booked - We’ll Call Within 1 Hour”
- Body: “Hi [FirstName], Thanks for booking your free consultation! We’ll call you within 1 hour. Excited to chat!”
- Click Save
Step 2b: Add the first condition (budget check):
- Click + Add Step
- Select Condition
- Set condition: Contact’s Budget field equals “$5,000+”
- This creates two branches: “YES” and “NO”
Step 2c: In the YES branch (hot VIP leads):
- Click + Add Action in the YES branch
- Select Add Tag → Create tag “Hot Lead - VIP”
- Click + Add Action → Select Send SMS
- SMS body: ”🔥 VIP hot lead: [FirstName] [LastName], $5K+ budget, timeline: [Timeline]. Call ASAP.”
- Click + Add Action → Select Create Task
- Task title: “Call [FirstName] [LastName] - $5K+ VIP lead - within 1 hour”
- Click + Add Action → Select Send Email
- Email subject: “A specialist will call you within 1 hour”
- Email body: “Hi [FirstName], Based on your needs, we’re routing you to our top specialist. They’ll call you within 1 hour. Look for a call from [Your Phone].”
Step 2d: In the NO branch (non-VIP hot leads):
- Click + Add Action in the NO branch
- Add a second condition: Check if TIMELINE = ”< 30 days”
- Branch again into HOT (timeline <30 days) and WARM (else)
- In the HOT sub-branch: repeat 2c actions (tag, SMS, task, email)
- In the WARM sub-branch: add email sequence (see below)
Step 2e: Add email sequence for warm leads (3 emails over 5 days):
- Click + Add Action in the WARM branch
- Select Send Email
- Email 1: “Why Companies Like Yours Choose Us” (benefits + social proof)
- Click + Add Step → Select Wait
- Set delay to “2 days”
- Click + Add Action → Select Send Email
- Email 2: “Case Study: How [Company] Increased Revenue 40%” (ROI-focused)
- Click + Add Step → Select Wait
- Set delay to “2 days”
- Click + Add Action → Select Send Email
- Email 3: “Limited Spots Available for Q2. Reserve Yours.” (urgency + CTA)
- Click + Add Step → Select Create Task
- Task: “Follow up with [FirstName] if no response by [date]”
Step 2f: Add cold lead path (nurture until they show interest):
- In the NO branch of the main condition, add a tag “Cold Lead”
- Send email: “Thanks for your interest. Download this free guide: [resource]”
- Wait 14 days
- Add condition: “Email opened?” or “Link clicked?”
- If YES: move to WARM path (re-tag as “Warm Lead” and start email sequence)
- If NO: send final “still interested?” email, then end workflow
Step 2g: Activate:
- Click Activate Workflow at the top right
- Confirm: “Yes, activate”
- The workflow is now live
Result
Every lead that fills your form now triggers this workflow. Within seconds:
- Hot leads get routed to sales with SMS notification
- Warm leads get a 5-day nurture sequence
- Cold leads stay engaged with periodic emails
- Your sales team has zero “cold outreach” emails to send; only hot leads to call
Estimated ROI: 20–40 hours per week saved, 50% faster lead response time, 20% higher conversion rate for hot leads (because reps call within 1 hour, not 24+ hours).
Real-World Automation Template 2: Appointment Booking Automation (15 minutes)
This workflow automates the entire booking-to-confirmation process.
Trigger: Contact books appointment via GoHighLevel calendar widget
Workflow:
TRIGGER: Appointment booked
   ↓
Send SMS: "Your appointment is confirmed for [DATE] at [TIME]. Reply CONFIRM to confirm."
   ↓
CONDITION: Did contact reply CONFIRM?
   ├─ YES: Send email with Zoom link + agenda
   │    └─ WAIT until 1 hour before appointment
   │        └─ Send SMS reminder: "Your call with [Rep Name] starts in 1 hour. Zoom link: [link]"
   │
   └─ NO: WAIT 24 hours
        └─ Send email: "We haven't heard from you. Confirm your appointment here: [link]"
             └─ CONDITION: Did they confirm?
                  ├─ YES: Send Zoom link + agenda (same as above)
                  └─ NO: Cancel appointment and send email: "We've freed up your spot for another client"
Build time: 15 minutes (much simpler than Template 1 because fewer branches).
Real-World Automation Template 3: Abandoned Cart Recovery (20 minutes)
For agencies with a Shopify or online course store, recover lost sales from prospects who added items but didn’t buy.
Trigger: Contact added product to cart but didn’t purchase (tracked via Zapier or webhook)
Workflow:
TRIGGER: Abandoned cart detected
   ↓
Send SMS: "You left [Product Name] in your cart. Complete your purchase by midnight: [checkout link]"
   ↓
WAIT 6 hours
   ↓
Send email: "Your Cart is Expiring: [Product Name] + [OtherProducts]"
   ├─ Include product images
   ├─ Include urgency: "Only 2 left in stock"
   └─ Include discount (optional): "Use code HURRY10 for 10% off"
   ↓
WAIT 12 hours
   ↓
CONDITION: Did they purchase?
   ├─ YES: Send thank you email + onboarding resources
   │        └─ END
   │
   └─ NO: Send final email: "Last chance: [Product Name] available for 4 more hours"
        └─ WAIT 4 hours
        └─ Remove from workflow (assume they've moved on)
Expected result: Recover 15–25% of abandoned carts (industry average is 10–15%; workflows often exceed average due to multiple touchpoints).
Real-World Automation Template 4: Webinar Follow-Up Funnel (30 minutes)
Maximize webinar attendance and post-webinar conversion with an automated sequence.
Trigger: Contact registered for webinar (via form submission)
Workflow:
TRIGGER: Webinar registration form submitted
   ↓
Send email: "Your webinar access link: [zoom_link]"
   ├─ Email subject: "Join us [DATE] at [TIME]: How to [benefit]"
   ├─ Include agenda and speaker info
   └─ P.S. "Add to calendar: [ICS file link]"
   ↓
WAIT: Until 24 hours before webinar
   ↓
Send SMS: "Reminder: Your webinar starts tomorrow at [TIME]. Zoom link: [link]"
   ↓
WAIT: Until 15 minutes before webinar
   ↓
Send SMS: "Join now! Link: [zoom link] (starting in 15 min)"
   ↓
WAIT: Until 10 minutes after webinar ends
   ↓
Send email: "Thank you for attending! Here's the recording: [link]"
   ├─ Include key takeaways
   ├─ Include slides download link
   ├─ Include CTA: "Ready to implement? Book a strategy call: [booking link]"
   └─ Include special offer: "Webinar attendees only: 20% off first month"
   ↓
CONDITION: Did they click the "book call" link?
   ├─ YES: Send "Your call is confirmed" + pre-call questionnaire
   │        └─ Tag as "Sales-Ready"
   │        └─ Assign to sales rep
   │        └─ Create task: "Prepare for discovery call with [Name]"
   │
   └─ NO: WAIT 2 days
        └─ Send email: "Can't make a call yet? Download our DIY guide: [PDF link]"
             └─ WAIT 5 days
             └─ CONDITION: Did they download?
                  ├─ YES: Send email: "Excited to help! Let's schedule: [booking link]"
                  └─ NO: Send final email with testimonial from past client + booking link
Key insight: This workflow increases webinar ROI by 30–50% because it creates multiple touchpoints (SMS reminders, post-webinar CTA, follow-up sequence) instead of relying on one email.
Real-World Automation Template 5: Customer Onboarding Sequence (40 minutes)
After a prospect becomes a customer, automate the first 30 days of onboarding.
Trigger: Contact becomes a customer (purchase recorded or marked in CRM)
Workflow:
TRIGGER: Contact marked as "Customer" or "Purchase" recorded
   ↓
Send email: "Welcome! Here's Your Onboarding Plan"
   ├─ Include login credentials / access link
   ├─ Include next steps (3 specific actions for this week)
   ├─ Include support contact info
   └─ Schedule 1:1 onboarding call
   ↓
WAIT 1 day
   ↓
Send email: "Step 1: [First specific onboarding task]"
   ├─ Include screenshot / video walkthrough
   ├─ Include FAQ for this step
   └─ CTA: "Mark as complete here: [link]"
   ↓
WAIT 2 days
   ↓
Send email: "Step 2: [Second specific onboarding task]"
   └─ Repeat structure above
   ↓
WAIT 2 days
   ↓
Send email: "Step 3: [Third specific onboarding task]"
   └─ Repeat structure above
   ↓
WAIT 3 days
   ↓
Send email: "You're On Track! Here's [advanced feature]"
   ├─ Include advanced tips
   ├─ Include troubleshooting guide
   └─ Offer live support
   ↓
WAIT 7 days
   ↓
Send email: "How's Your Implementation Going? Let's Check In"
   ├─ Include link to schedule 30-day check-in call
   ├─ Include common wins other customers achieved
   └─ CTA: "Book your 30-day call: [link]"
   ↓
WAIT 10 days
   ↓
CONDITION: Did they book check-in call?
   ├─ YES: Create task for success manager, send "Call confirmed" email
   │
   └─ NO: Send SMS: "Want to see what's possible? Let's chat: [booking link]"
        └─ WAIT 5 days
        └─ Send email: "Success story from a customer like you: [case study]"
Key insight: Onboarding automation reduces churn by 25–40% because customers have clear guidance in their first 30 days (vs. confusion and abandonment when left to their own).
Real-World Automation Template 6: VIP Customer Retention (30 minutes)
High-value customers churn when neglected. Automate VIP engagement to keep them happy.
Trigger: Contact marked as “VIP Customer” (custom field or tag)
Workflow:
TRIGGER: Contact tagged "VIP Customer"
   ↓
Send SMS: "Hi [FirstName]! Your dedicated success manager is [Manager Name]. Direct line: [phone]. Available anytime."
   ↓
WAIT 7 days
   ↓
Send personalized email: "Exclusive: VIP members get early access to [new feature]"
   ├─ Include feature benefits
   └─ CTA: "Want a sneak peek? Book a call: [link]"
   ↓
WAIT 7 days
   ↓
Send email: "We noticed you haven't used [feature]. Let's show you how to maximize ROI: [scheduling link]"
   ↓
WAIT 14 days
   ↓
Send email: "[Testimonial from similar customer] 'This feature saved us $50K/year.' Can we show you how?"
   ↓
WAIT 14 days
   ↓
Send SMS: "[Manager Name] here. Checking in. Any questions or needs we can help with? Reply to this message."
   ↓
WAIT 21 days
   ↓
Send email: "VIP Exclusive Event: [Webinar/Workshop] for high-value customers only"
   ├─ Positions you as invested in their success
   └─ Strengthens relationship
   ↓
REPEAT quarterly (or adjust based on engagement)
Key insight: VIP workflows prevent surprise churn (when a customer suddenly leaves). Regular touchpoints catch dissatisfaction early so you can intervene.
Advanced: Conditions & Branching (The Power Move)
Simple workflows are linear. Powerful workflows branch.
Example: Multi-Condition Routing
CONDITION 1: Customer budget >= $5,000?
   ├─ YES → CONDITION 2: Timeline < 30 days?
   │         ├─ YES → Route to top sales rep (VIP hot path)
   │         └─ NO → Route to standard sales rep (VIP warm path)
   │
   └─ NO → CONDITION 3: Decision-maker = yes?
           ├─ YES → Route to sales rep (hot path)
           └─ NO → Add to nurture sequence (warm path)
In GoHighLevel, this looks like:
- First condition: Budget >= $5,000?
- In the YES branch: Add a second condition: Timeline < 30 days?
- In the nested YES branch: Add tag “VIP Hot Lead” + route to top rep
- In the nested NO branch: Add tag “VIP Warm Lead” + route to standard rep
- In the NO branch of condition 1: Add a second condition: Decision-maker = yes?
- Continue branching…
Complexity trade-off: More conditions = more branches = more powerful logic, but also harder to visualize and maintain. Aim for 2–3 levels of branching max (if 4+ levels, simplify by combining conditions).
Step-By-Step: Build Your First Workflow in 15 Minutes
Let’s build a simple “form submission → welcome email → 2-day follow-up” workflow.
Phase 1: Create a Landing Page (5 minutes)
- Go to GoHighLevel → Funnels → Create Landing Page
- Choose a template (pick any; we’ll customize)
- Change headline to “Book Your Free Consultation”
- Add form with fields: Email, First Name, Company Name
- Set button text to “Get Started”
- Click Publish; note the URL
Phase 2: Create the Workflow (10 minutes)
- Go to Automations → Create New Workflow
- Name: “Welcome & Follow-Up”
- Click Add Trigger
- Select Form Submitted → Choose the landing page from Phase 1
- Click Add Action
- Select Send Email
- Create new email:
- From: Your name (or agency name)
- Subject: “Hi [FirstName], Welcome to [Agency]!”
- Body: “Thanks for booking your consultation. Here’s what happens next: [3 bullet points]. We’re excited to help!”
- Click Save Email
- Click Add Step → Select Wait
- Set delay to “2 days”
- Click Add Action → Select Send Email
- Create second email:
- Subject: “Quick Question: [FirstName], Are You Still Interested?”
- Body: “Just following up. Do you still want to chat about [service]? Reply here or book a time: [calendar link]”
- Click Save Email
- Click Activate Workflow
Done!